How to Install and Set Up Android vShell (Virtual Shell) App (No Root) 👨💻📱
Are you a tech enthusiast who craves the power of Linux on your Android device? Look no further! The Android vShell (Virtual Shell) app is here to fulfill your desires without the need for root access. This comprehensive guide will walk you through the clean and professional steps of installing and setting up the vShell app on your Android device. 🚀
System Requirements 📋
Before we dive into the installation process, let's make sure your device meets the necessary requirements:
- Android OS versions 7.0 (Nougat) and newer
- Minimum Capacity: 8GB
- Processor: 2.5GHz quad-core application processor
- Internet Connection Required 😢
What is Android vShell (Virtual Shell) Application? 📚
Android vShell, the successor to the Termux project, introduces a refreshing take on the Linux terminal emulator for the Android operating system. Unlike its predecessor, this application leverages QEMU to emulate x86_64 hardware, allowing it to run the Alpine Linux distribution seamlessly.
This innovative approach ensures that vShell operates independently of the Android OS, complete with its own kernel and unrestricted root access, granting you unparalleled control over the system. Unlike Termux, vShell boasts a wider array of packages with enhanced quality, as they no longer need to be ported to the Android OS. 📦💼
Moreover, this application is compatible with any Android version from 7.0 onwards. It manages to steer clear of the tightening security measures introduced in recent Android updates, maintaining its functionality and performance.
Downloading Android vShell 📥
Getting your hands on the vShell app is a breeze! Just follow these steps:
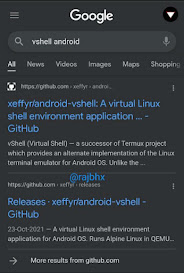
- Visit the official GitHub repository: Click here
- Or, if you prefer, search "vShell Android" on Google.

Installing vShell on Your Android Device 📲
Once you've secured the vShell app, follow these steps to install it:
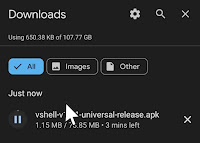
- Download the latest APK from the provided link.
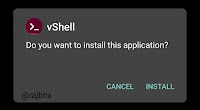
- Click on the downloaded APK file to initiate the installation process.

Allow necessary permissions if prompted.
Getting Started with vShell 💼
After a successful installation, it's time to dive into the world of vShell:
- Open the vShell app on your Android device.
- Use the following default login credentials:
- Username: root
- Password: none

Perform a quick setup to familiarize yourself with the environment.
Important Tips and Considerations ⚠️
While vShell offers a world of possibilities, keep the following in mind:
- The file system is ephemeral (tmpfs), meaning changes to the rootfs will be discarded upon reboot.
- Use the 'lbu commit' command to save your changes and customize your configuration.
- Directories such as /home and /root are bind-mounted to persistent storage (/media/sda1/volumes/*).
- If you require ample space for installations, consider re-installing Alpine Linux on a hard drive.
Quick HDD Installation Guide 🖥️
For those looking to optimize their vShell experience, here's a rapid HDD installation guide:
- Remove existing cache and files:
rm -rf /etc/apk/cache /etc/motd /media/sda1/* - Set up the disk:
setup-disk -m sys /media/sda1/ - Install the bootloader:
extlinux --install /media/sda1/boot - Reboot your device.

After rebooting, relaunch the vShell app and log in to the system. Type 'setup-alpine' to complete the process.
Conclusion 🎉
Congratulations, you are now equipped with the knowledge to seamlessly install and set up the Android vShell (Virtual Shell) app on your device. Embrace the power of Linux and explore a new realm of possibilities. Whether you're a developer, a tinkerer, or simply a curious tech aficionado, vShell opens the door to a world of creativity and customization. Happy shell-ing! 🐚🤖

